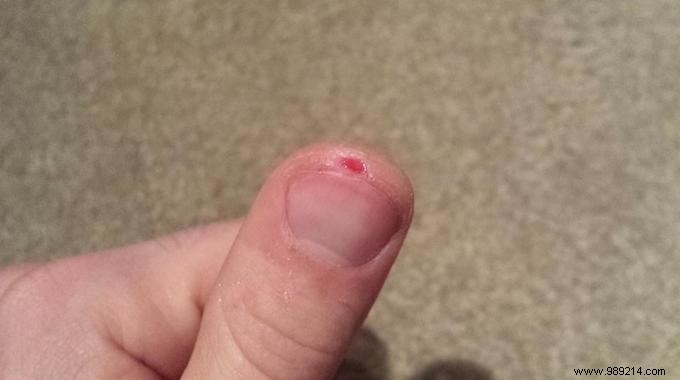
We've all experienced minor cuts on our fingertips. These small wounds sting with every touch and are often caused by a sharp kitchen knife.
To protect the injury, a bandage is essential. But fingertips make it tricky—standard bandages slip off easily. Here's a proven, simple technique used by many for reliable adhesion.
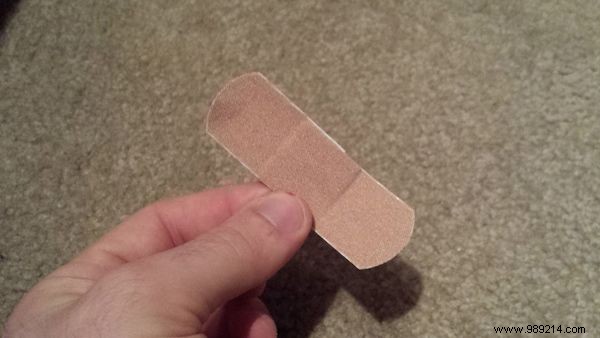
1. Select a medium or large bandage
Contents
- 1. Select a medium or large bandage
- 2. Cut each self-adhesive tab in the middle
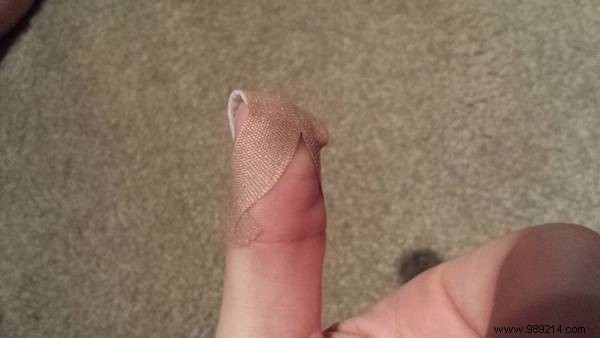
- 3. Position the pad over the cut with sticky ends toward your nail; cross the two strips in opposite directions
- 4. From the opposite side, fold the other two strips over the top of the finger
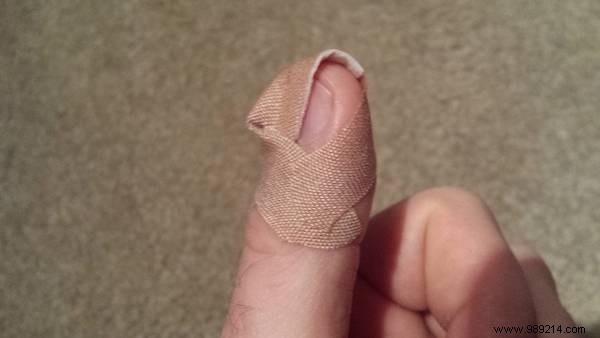
- 5. Ensure the second pair fully overlaps the first for maximum hold
- 6. Done—the bandage will stay secure much longer
- Result
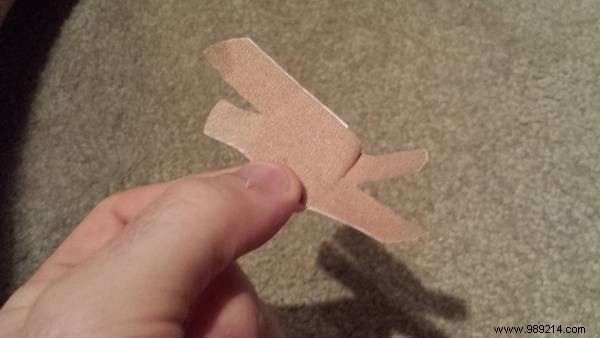
2. Cut in the middle of each self-adhesive tab
3. Place the pad over the cut with sticky ends toward your nail and cross the two strips in opposite directions
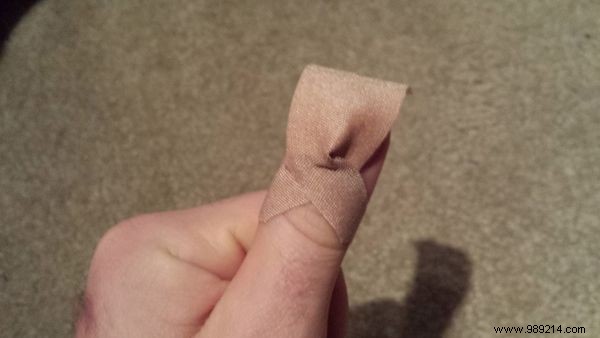
4. From the opposite side, fold the other two strips over the top of the finger
5. Ensure the second pair fully overlaps the first for a secure hold
6. Done—your bandage will stay secure much longer
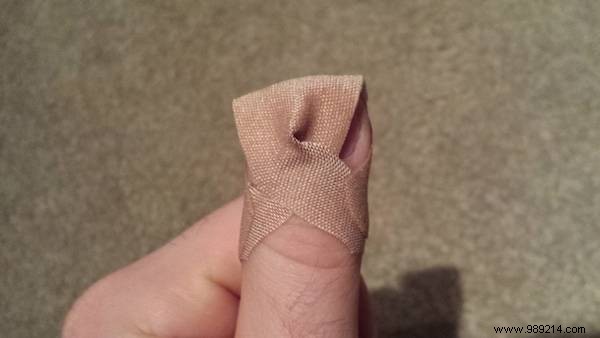
This method provides far better adhesion than a standard wrap-around application.
Result
Your fingertip bandage now stays in place for extended periods. Ideal for kitchen accidents or a child's minor cut.