
To be beautiful to the tips of your nails, you no longer need to appeal to a professional.
With the reverse french manicure, you will make your nails fun and colorful simply and in no time.
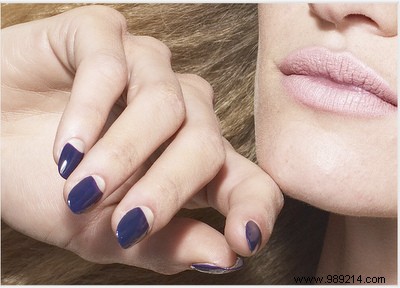
Popular since last winter, the reverse French manicure consists of drawing a lunula on the upper part of the nail. Thus, we no longer color the tip of the nail in white as we did before.
This is why this technique is called a reverse French manicure.
At the same time, it has the advantage of being more practical because it is more durable than a usual French manicure.
Indeed, we generally damage the tips of our nails more often, and this is often where the varnish flakes off.
Here, no worries, the work is done at the base of it!
More fun and less usual, the reverse French manicure is what you need to be sexy this summer.
1. Two nail polishes. Choose colors that go together very well. I opt for the mix of golden glitter varnish to make the small lunula, and pale nude pink for the rest of the nail. A simple and very chic version!
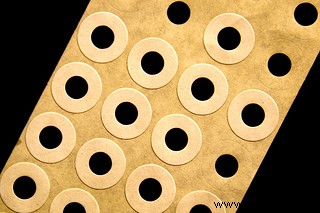
2. Carnations. Those used to protect the sheets that are stored in the filing cabinets. They will make it possible to obtain the shape of an arc on the base of the nail, using the children's stencil technique.
3. A pair of tweezers. No, it's not to redo the line of your eyebrows while waiting for the varnish to dry (although, the idea is not stupid...), but simply to remove more easily the eyelet stuck to your nail once times the lunula drawn.
The material in front of me, at hand, I start with this first step.
I choose the varnish that will color the biggest part of the nail. As I said before, for me it will be nude pink.
I put a first coat of varnish on all my nails, and then a second, to prevent my varnish from chipping too quickly in the days to come.
I let it dry, and to make it go faster, I run my nails under cold water.
My varnish is perfectly dry. I move on to creating my moons.
To do this, I take my carnations. I stick one on each nail, about half way down the eyelet, so it makes an arc on my nail. The goal is to form a small lunule on the base of the nail, not to cover it entirely.
Once the eyelet is glued halfway to my nail, I color the inside with my second nail polish. So for me it will be the gold glitter nail polish.
I wait 30 seconds before removing the eyelet.
Having done this reverse french manicure last night, I can confirm that removing the eyelet is not without difficulty.
It is necessary to prevent the varnish from drooling on the first layer when the eyelet is removed.
For this, I remove the eyelet using tweezers, having waited until the varnish has slightly taken on the nail. Be careful, the varnish must not be completely dry either because it may flake off.
This is surely the most delicate phase of this French manicure. Take your time and gently remove the eyelet.
Once the operation is successful, let it dry. We may apply a top coat, or transparent varnish, which will protect and strengthen the nail, to make our French manicure last longer.
That's it, my reverse french manicure is successful. The result is up to my expectations. It's very trendy and I'll be able to renew the experience over and over again with different shades and different combinations. Summer will be colorful, summer will be fun!
In addition, this operation is inexpensive, if not the carnations and the varnish. But when you think that nail polishes are getting cheaper and cheaper (I found mine for €1.5 each ), this is an opportunity to have fun.
Above all, I avoid the exorbitant cost of a French manicure at a beautician, or 25 € minimum.
So, girls, are you going to try the reverse French manicure this summer? Tell me in your comments.